B4J: ABTelegram bots library

Bots are the next hot thing in 2016! So in my spare-spare time I’ve been working on a wrapper for the Telegram API v2.0. It has a rather unconventional API but I’m reworking it to make it very easy to write bots in B4J.

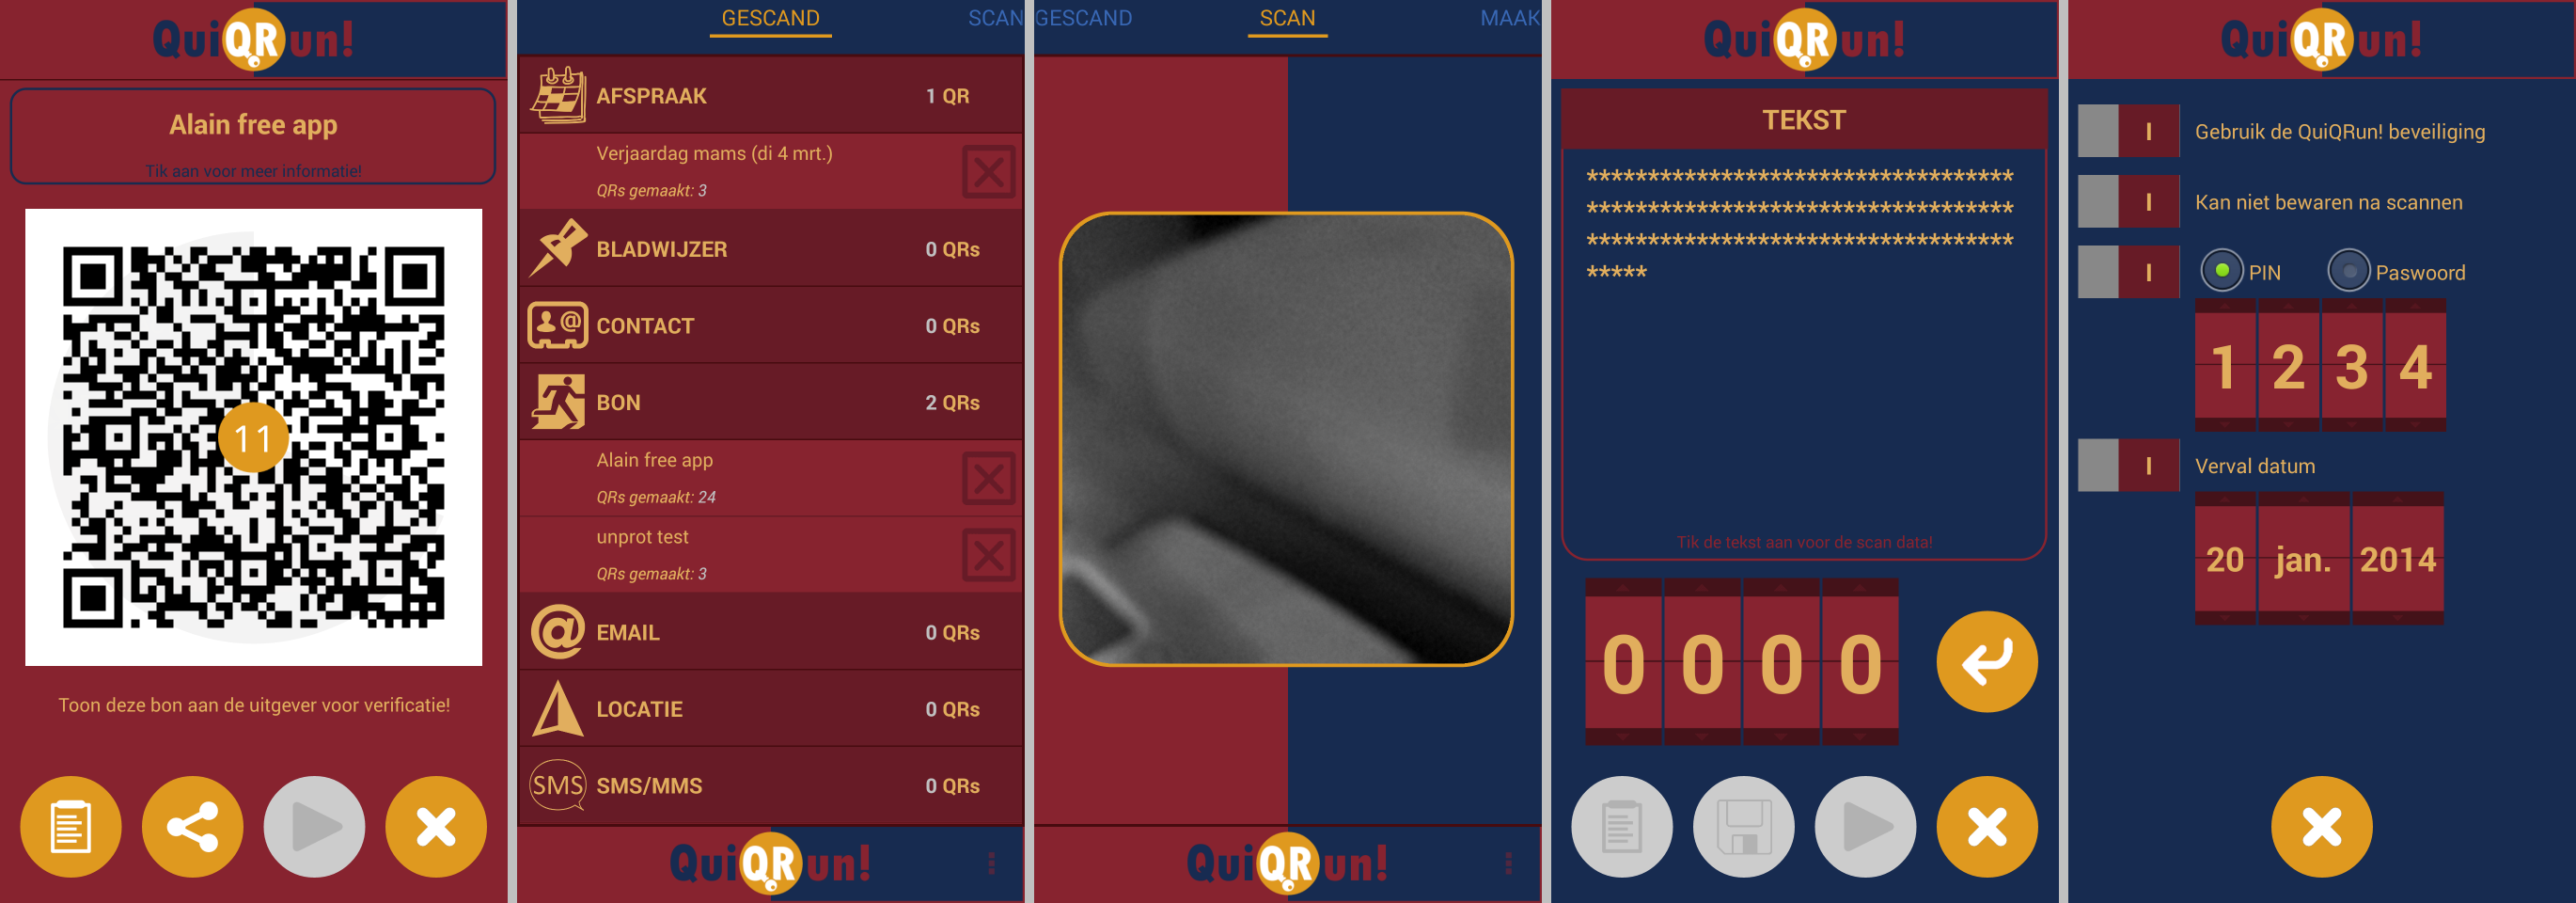
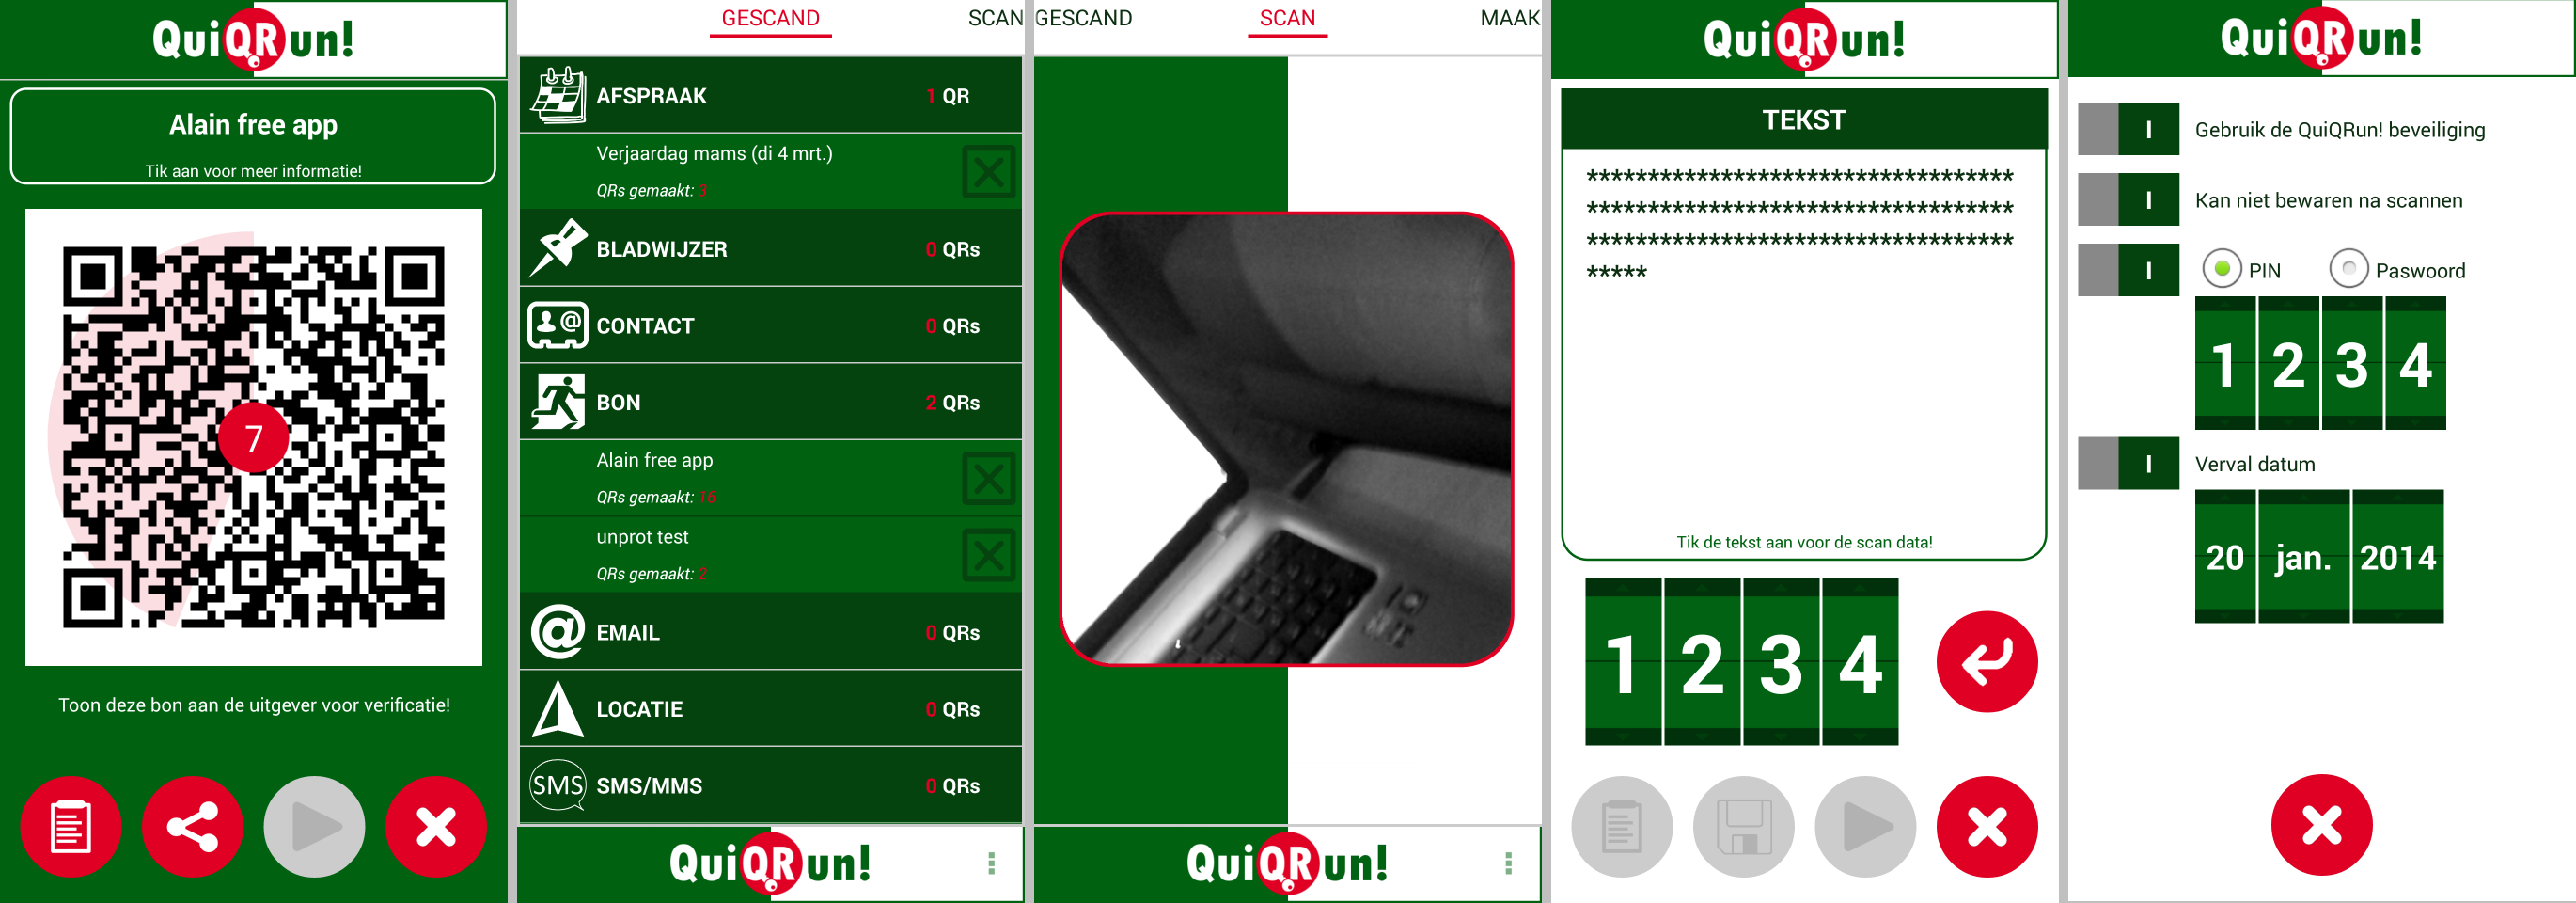
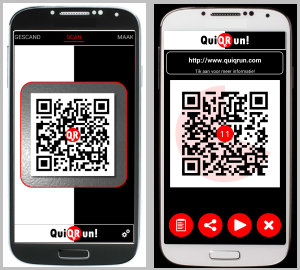
Bots could be very useful as yet another way to ‘talk’ with IoT devices. You can control LEDs, temperatures, ask for stats etc right from within the Telegram Chat App (which runs on about every kind of platform, being the desktop, a browser, iOS, Android, etc…). Or you can, like I did to test the wrapper, write a little game:

ABTelegram

Note: this library is in very early stages so the wrapper is not available for download yet. Full source code of the game will also be available when released.

Some sample code to show you how easy it is to write a bot in B4J (this is not the game code, just some tests):

Code to initialize the library:

Sub Process_Globals
   Dim ABT As ABTelegram
End Sub

Sub AppStart (Args() As String)
   Dim b As MyBot
   b.Initialize
   ABT.RegisterLongPollingBot(b.Bot)

   StartMessageLoop
End Sub

Code for the Bot:

'Class module
Sub Class_Globals
Dim ABT As ABTelegram
Public Bot As ABTLongPollingBot
Private botToken As String = "207189xxxx:yyyyyyyyyyyyyyyyyyyyyyyyyyyyyyyyyyyy"
Private botUserName As String = "zzzzzzzzzBot"
'Private callbackCounter As Int
End Sub

'Initializes the object. You can add parameters to this method if needed.
Public Sub Initialize
Bot.Initialize("Bot", Me, botToken, botUserName)
Dim upds As List = Bot.botgetUpdates
For i = 0 To upds.Size - 1
Dim upd As ABTUpdate = upds.Get(i)
Log("Go update: " & upd.UpdateId)
Next
End Sub

Sub Bot_UpdateReceived(update As ABTUpdate)
Log("Got an update")
If update.hasMessage Then
Dim msg As ABTMessage = update.GetMessage
Log("Message: " & msg.Text)

'        Dim userPhotos As ABTUserProfilePhotos = Bot.BotGetUserProfilePhotos(msg.Chat.id)
'        Log("photos: " & userPhotos.TotalCount)
'        Dim Photos As List = userPhotos.Photos
'        For i = 0 To Photos.Size - 1
'            Dim photoSizes As ABTPhotoSizes = Photos.Get(i)
'            For j = 0 To photoSizes.Sizes.Size - 1
'                Dim photoSize As ABTPhotoSize = photoSizes.Sizes.Get(j)
'                Dim photoFile As ABTFile = Bot.BotGetFile(photoSize.FileId)
'                Log(photoFile.FilePath)
'
'                Dim job1 As HttpJob
'                job1.Initialize("Job" & j, Me)
'                job1.Tag = photoFile.FilePath.Replace("photo/", "")
'
'                Dim url As String = "https://api.telegram.org/file/bot" & botToken & "/" & photoFile.FilePath
'                   job1.Download(url)
'               Next
'        Next

'        callbackCounter = callbackCounter + 1
'        Bot.BotSendMessageAsync(callbackCounter, msg.ChatId, "Alweer hallo " & msg.Chat.FirstName)

Bot.BotSendMessage(msg.ChatId, "Using an Emoji " & ":grinning: in the message!") ' see    https://github.com/vdurmont/emoji-java for a list of emojis

'        Bot.BotSendPhoto(True, msg.ChatId, File.DirApp & "/" & "telegram.png")

'        callbackCounter = callbackCounter + 1
'        Bot.BotSendDocumentAsync(callbackCounter, True, msg.ChatId, File.DirApp & "/" & "mydocument.pdf", "mydocument.pdf")

'        Bot.BotSendDocument(True, msg.ChatId, File.DirApp & "/" & "mydocument.pdf", "mydocument.pdf")

Bot.BotSendAudio(True, msg.ChatId, File.DirApp & "/" & "myaudio.mp3")

'        Bot.BotSendVideo(True, msg.ChatId, File.DirApp & "/" & "myvideo.mp4")

'        Bot.BotSendSticker(True, msg.ChatId, File.DirApp & "/" & "mysticker.webp")

'        Bot.BotSendContact(msg.ChatId, "+32496000000", "Alain")

'        Bot.BotSendChatAction(msg.ChatId, ABT.CHATACTIONTYPE_TYPING)

'        Bot.BotSendLocation(msg.ChatId, 50.8492, 2.8779)

'        Bot.BotSendVenue(msg.ChatId, 50.8492, 2.8779, "my venue", "Grote markt 1")

Bot.BotSendVoice(True, msg.ChatId, File.DirApp & "/" & "telegram.ogg")

'        Dim keyb As ABTReplyKeyboard
'        Dim rows As List
'        rows.Initialize
'        Dim tmpRow As ABTInlineKeyboardRow
'        tmpRow.Initialize
'        tmpRow.AddButton("test button", "http://one-two.com", "", "")
'        rows.Add(tmpRow)
'        keyb.InitializeAsInlineKeyboardMarkup(rows)
'        Bot.BotEditMessageTextEx(msg.ChatId, msg.MessageId, 0, "Extended test", ABT.PARSEMODE_HTML, False, keyb)

Dim rkeyb As ABTReplyKeyboard
rkeyb.InitializeAsForceReplyKeyboard(False)
Bot.BotSendMessageEx(msg.ChatId, "some test: reply please", ABT.PARSEMODE_HTML, False, False, 0, rkeyb)

'        Dim rkeyb2 As ABTReplyKeyboard
'        Dim rows2 As List
'        rows2.Initialize
'        For i = 1 To 100
'            Dim tmpRow2 As ABTKeyboardRow
'            tmpRow2.Initialize
'            tmpRow2.AddButton("Press me")
'            rows2.Add(tmpRow2)
'        Next
'        rkeyb2.InitializeAsReplyKeyboardMarkup(rows2,False, False, False)
'        Bot.BotSendMessageEx(msg.ChatId, "some test: press the button", ABT.PARSEMODE_HTML, False, False, 0, rkeyb2)

'        Dim rkeyb3 As ABTReplyKeyboard
'        Dim rows3 As List
'        rows3.Initialize
'        Dim tmpRow3 As ABTInlineKeyboardRow
'        tmpRow3.Initialize
'        tmpRow3.AddButton("Show image", "", "showimage", "")
'        rows3.Add(tmpRow3)
'
'        rkeyb3.InitializeAsInlineKeyboardMarkup(rows3)
'        Bot.BotSendMessageEx(msg.ChatId, "some test: press the button", ABT.PARSEMODE_HTML, False, False, 0, rkeyb3)
End If
If update.hasCallbackQuery Then
Dim cquery As ABTCallbackQuery = update.GetCallbackQuery
Log("CallbackQuery: " & cquery.data)
Select Case cquery.Data
Case "showimage"
Dim msg As ABTMessage = cquery.Message

Bot.BotSendPhotoEx(True, msg.ChatId , File.DirApp & "/" & "myphoto.jpg", "A new photo of darth vader!",False, 0, Null )
Bot.BotSendLocation(msg.ChatId, 50.8492, 2.8779)
Bot.BotEditMessageText(msg.ChatId, msg.MessageId, "", "Shown")
End Select
End If
If update.hasInlineQuery Then
Dim ciquery As ABTInlineQuery = update.GetInlineQuery
Log("InlineQuery: " & ciquery.Query)
If ciquery.Query = "loc" Then
Dim lstResults As List
lstResults.Initialize
Dim myanswer As ABTInlineQueryResult
myanswer.InitializeAsLocation("1", 50.8492, 2.8779, "Your location")
lstResults.Add(myanswer)
Bot.BotAnswerInlineQuery(ciquery.Id, lstResults)
End If
End If
If update.hasChosenInlineResult Then
Dim ccresult As ABTChosenInlineResult = update.GetChosenInlineResult
Log("ChosenInlineResult: " & ccresult.Query)
End If
End Sub

Sub Bot_AsyncSendReceived(methodType As String, callbackId As String, success As Boolean, asyncObject As ABTObject)
Log("Async method: " & callbackId & " " & methodType & " " & success)
If success And asyncObject <> Null Then
If asyncObject.objectType="ABTMessage" Then
Dim message As ABTMessage = asyncObject
Log("Async callback: " & message.MessageId)
End If
End If
End Sub

Sub JobDone (Job As HttpJob)
Log("JobName = " & Job.JobName & ", Success = " & Job.Success)
If Job.Success = True Then
Dim fSave As OutputStream = File.OpenOutput(File.DirApp, Job.tag, False)
File.Copy2(Job.GetInputStream, fSave)
fSave.Close
Else
Log("Error: " & Job.ErrorMessage)
End If
Job.Release
End Sub

Alwaysbusy

Click here to Donation if you like my work


B4J: ABMaterial Public 1.07/Donators 1.08 now released

ABMaterial public version 1.07 is now available from the B4J website!

What’s new:

ABMGenerator object: allows generating CRUD and messagebox modal sheets fast

Given a set of parameters in a couple of lines of code, ABMGenerator can generate several hundreds of lines of B4J code that only need to be tuned by the programmer to its specific wishes.

Refer to this post for more info.

Infinite Scrolling pages (e.g. like Twitter or Facebook)

With just a couple of lines code, you can create Infinite Scrolling Pages with ABMaterial.

See this post for more info and a demo.

Support for Google Analytics

more info and a tutorial, check out this previous article.

New component ABMSocialShare


abmaterial-socialshare

New component ABMEditor

abmeditor

Read the README1.07.TXT for the full release notes.

Download ABMaterial Public version 1.07

Version 1.08 is going to be all about speed! But I’ll post a seperate article on my experiences here later on this. A couple of new components off course and some new functionalities in the ABMNavigationBar. Donators should have received this version by now. (mail me if you didn’t).

Alwaysbusy

Click here to Donation if you like my work


B4R (Basic4Arduino) is coming!

Excellent news from Erel (CEO of Anywhere Software).  The excellent B4X suite will support yet another platform: Arduino!  Next to support for all desktop platforms, webapps, Raspberry Pi, Android and iOS this new addition is another great step from Anywhere Software towards the most simple framework to make IoT applications.

Unlike the other platforms which generate Java, B4R will generate native C.  Users will be able to write their own libraries or use inline C for specific functionalities.  More on this later, but make sure you check out the video!


B4J: ABMaterial Public 1.06/Donators 1.07 now released

The public version 1.06 of ABMaterial is now available from the B4J website!

Some highlights on this public release:

Theme and controls have a Colorize() method to quickly change a theme
Getting more out of the Theme system. Just by using the one single line in B4J, theme.Colorize(myColor), you can change the base color of ABMaterial. You can of course still tune it manually.

Colorizing a theme in one line in ABMaterial

ABMDataTimeScroller
New component to let the user choose a date through a scroller.  Can be used to get the date, the time or both. See the demo for more.

The DateTime Scroller of ABMaterial

ABMDateTimePicker
Alternative component to let the user choose a date/time.  The date can be picked on a calendar, the time on a clock. See the demo for more.

The Date picker of ABMaterial

The Time picker of ABMaterial

Speed gain by using minified versions of the javascript/css files
This is just the first step in speeding up ABMaterial and the user experience both on a desktop and a mobile device. I continue searching for methods to make ABMaterial even faster!

Read the README1.06.TXT for the full release notes.

Download ABMaterial Public version 1.06

Donators will receive an email with the download link to ABMaterial 1.07 containing two new controls, ABMEditor and ABMSocialShare.  A optimized TreeView and Google Analytics support is also included!

Happy programming!

Alwaysbusy

Click here to Donation if you like my work


B4J: Using Google Analytics with ABMaterial

ABMaterial and Google Analytics

As ABMaterial is a hybrid website/webapp framework, you can use SEO (see previous article), and now even Google Analytics in the upcoming version 1.07. This article shows how you can use Google Analytics by adding just one extra line of B4J code on your page!

Note: This post is an ABMaterial adaptation of an excellent article for beginners on Google Analytics by Kristi Hines. Just to make it easier for you, I used and changed it just up to where ABMaterial comes in.  At the end of this post you can then continue reading the original one for more tips and tricks.

Why every website/webapp needs Google Analytics

Here are just a few of the many questions about your ABMaterial website/webapp that you can answer using Google Analytics.

  • How many people visit my website/webapp?
  • Where do my visitors live?
  • What websites send traffic to my website/webapp?
  • What marketing tactics drive the most traffic to my website/webapp?
  • Which pages on my website/webapp are the most popular?
  • How many visitors have I converted into leads or customers?
  • Where did my converting visitors come from and go on my website/webapp?
  • What content do my visitors like the most?

There are many, many additional questions that Google Analytics can answer, but these are the ones that are most important for most website/webapp owners. Now let’s look at how you can get Google Analytics on your ABMaterial website/webapp.

How to install Google Analytics

First, you need a Google Analytics account. If you have a primary Google account that you use for other services like Gmail, Google Drive, Google Calendar, Google+, or YouTube, then you should set up your Google Analytics using that Google account. Or you will need to create a new one.

This should be a Google account you plan to keep forever and that only you have access to. You can always grant access to your Google Analytics to other people down the road, but you don’t want someone else to have full control over it.

Big tip:

don’t let anyone (your web designer, web developer, web host, SEO person, etc.) create your website’s Google Analytics account under their own Google account so they can “manage” it for you. If you and this person part ways, they will take your Google Analytics data with them, and you will have to start all over.

Set up your account and property

Once you have a Google account, you can go to Google Analytics and click the Sign into Google Analytics button. You will then be greeted with the three steps you must take to set up Google Analytics.

google analytics setup

After you click the Sign Up button, you will fill out information for your website.

For the absolute beginner’s guide, we’re going to assume you have one website and only need one view (the default, all data view. The setup would look something like this.

new account information google analytics

Beneath this, you will have the option to configure where your Google Analytics data can be shared.

configuring shared info for google analytics

Our google account is setup and all we need now is get our Tracking ID and add it in ABMaterial.

Click the Get Tracking ID button. You will get a popup of the Google Analytics terms and conditions, which you have to agree to. Then you will get your Google Analytics Tracking ID.

Tracking ID in the Google Analytics Console

In our ABMaterial app, all we have to do is add this single line to each of our pages in the BuildPage() method:

page.Initialize(Name, “/ws/appName/Name, False)
page.UseGoogleAnalytics(“UA-64248213-1”, Null)

I guess it can’t get much easier, no?

If you want to go deeper into Google Analytics, I suggest reading the original article The Absolute Beginner’s Guide to Google Analytics.

ABMaterial 1.07 will be realeased in a couple of weeks for the donators. Addidtional to Google Analytics support, two new components ABMEditor and ABMSocialShare will be included, but more on this in a next article.

Happy programming!

Alwaysbusy


B4J: ABMaterial Public 1.05/Donators 1.06 now released

The public version 1.05 of ABMaterial is now available from the B4J website!  Three new controls:

ABMSlider: Add a slider for values with a wide range.

Range

ABMRange: Add a range slider for values with two handlers.

Slider

ABMCustomControl: add your own components to the ABMaterial framework.

CustomComponent

Some more highlights on this release:

  • Complete rewrite of the Refresh system
  • Material Icon Fonts are now loaded locally
  • Disable the back button in the browser
  • ABMModalSheet FULL size option
  • LocalStorage support
  • ABMPlatform object containing basic info on the users browser and device
  • Integrate variables for SEO-optimization
  • Responsive tables

Read the README1.05.TXT for the full release notes.

Download ABMaterial Public version 1.05

Donators will receive an email with the download link to ABMaterial 1.06 containing two new controls, ABMDataTimeScroller and ABMDateTimePicker.

Happy programming!

Alwaysbusy

Click here to Donation if you like my work

B4J: ABMaterial WebApps and SEO (Search Engine Optimization)

SEO

A feedback case I got from one of the users of ABMaterial, Herbert, was the question how ABMaterial for B4X coped with SEO-optimization. To be perfectly honest, I hadn’t really though about it. I  had a couple of things already, like headers, bold text, a page title and description.

As any good programmer,  if it looks nice, is user friendly and works as expected, my work is done and users will find and like it. No?

And it kept me thinking.  So this morning, lying awake at 4  o’clock (sleeping is highly overrated IMHO and an invention of the Bed Consortium, but I’m sidetracking), I decided to learn more about SEO and how it could be implemented in ABMaterial for B4X.

Herbert gave me some links, so I started reading up.

Looked like I had some things right already, but ABMaterial could use some polishing.

For starters, I added some extra properties to the ABMaterial page object that will be saved in the generated html file:

pageTitle: very important, pick good keywords
pageDescription: keep it around 140 to 160 chars
pageKeywords: a comma delimited string containing your page keywords
pageHTMLName: it is always index.html in ABMaterial, but it’s better to give it some name using keywords, like ‘abmaterial-custom-component.html’, use hyphens (-) between words to improve readability
pageSiteMapPriority: a value between 0.00 and 1.00, see further
pageSiteMapFrequency: how frequently the page is updated (never, none, always, hourly, weekly, yearly, …), see further

Headers:

Covered!  ABMaterials labels can have headers like <h1>, <h2> so we’re ok.  Tip: create only one <h1>!

<h1>Most Important</h1>
<h2>Second Most Important</h2>
<h3>Third Most Important</h3>

Bold:

Got it: You can use markers like {B}{/B} in labels to set text in bold/strong.

Use tag in a image:

Ah, needed some changes.  I misused it.  Thinking ‘who the #?@! can’t show images anymore these days‘, I used it as an image toggle property.  Changed it now so it can be used properly.

Hyperlinks:

Added some extra markers {AS}{/AS} in the ABMLabel Component so you can add a title.

{AL}http://www.website.com/page.html{AS}keyword{/AS}{AT}my visible text{/A}

will result in:

<a rel=”nofollow” target=”_black” href=”http://www.website.com/page.html” title=”keyword”>my visible text</a>

sitemap.xml and robots.txt:

The Sitemaps protocol allows a webmaster to inform search engines about URLs on a website that are available for crawling. ABMaterial has the possibility to generate a sitemap.xml file and a robots.txt file (for sites like Ask.com).

What does it look like Alwaysbusy, I hear you ask. Well, something like this:

<?xml version=”1.0″ encoding=”UTF-8″?>
</pre>
<urlset
xmlns=”http://www.sitemaps.org/schemas/sitemap/0.9”
xmlns:xsi=”http://www.w3.org/2001/XMLSchema-instance”
xsi:schemaLocation=”http://www.sitemaps.org/schemas/sitemap/0.9
http://www.sitemaps.org/schemas/sitemap/0.9/sitemap.xsd”&gt;
<!– created with ABMaterial and B4J –>
<url>
<loc>https://alwaysbusycorner.com/index.html</loc&gt;
<lastmod>2016-01-16T11:11:16+00:00</lastmod>
<changefreq>monthly</changefreq>
<priority>1.00</priority>
</url>
<url>
<loc>https://alwaysbusycorner.com/alwaysbusy-abmaterial-introduction.html</loc&gt;
<lastmod>2016-01-16T11:11:16+00:00</lastmod>
<changefreq>monthly</changefreq>
<priority>0.50</priority>
</url>
<url>
<loc>https://alwaysbusycorner.com/alwaysbusy-abmaterial-customcomponent.html</loc&gt;
<lastmod>2016-01-16T11:11:16+00:00</lastmod>
<changefreq>yearly</changefreq>
<priority>0.50</priority>
</url>
</urlset>

To generate this is easy in ABMaterial, and needs just a couple of things:

  1. In ABMShared, add a property  public AppPublishedStartUrl as String = “http://yoururl.com”.

  2. In the initalize() method of ABMApplication, add ‘ABM.AppPublishedStartUrl=ABMShared.AppPublishedStartUrl.

  3. In the BuildPage() method of each page, set page.PageHTMLName=”your-good-keywords.html”

  4. Also in BuildPage(), add page.PageSiteMapPriority = “0.50” (number between 0.00 and 1.00, and don’t set them all to 1.00, that makes them equally important)

  5. Also add page.PageSiteMapFrequency = ABM.SITEMAP_FREQ_MONTHLY (use one of the contstants)

  6. If you use a ABMNavigationBar, update the url of each sidebar item in ABMShared, e.g. page.NavigationBar.AddSideBarItem(“Contacten”, “Contacten”, “mdi-action-dashboard”, “../StartPage/your-good-keywords.html”)

  7. In ABMApplication, also change your InitialPage=”your-good-keywords.html”

  8. In ABMApplication, change ‘index.html’ in the AddPage() method to Page.PageHTMLName

When you start your app, the sitemap.xml and robots.txt files will be generated next to your apps html file. After publishing it to your final site, you let the search engines know you want to submit your site.

You should be able to use these sitemap-submission URLS. Put the full URL to your sitemap, including http://, after the = sign:

http://www.google.com/ping?sitemap=

http://www.google.com/webmasters/sitemaps/ping?sitemap=

http://www.bing.com/webmaster/ping.aspx?sitemap=

http://submissions.ask.com/ping?sitemap=

http://www.didikle.com/ping?sitemap=

So, you’re already one step ahead of many other tools when you use B4J and ABMaterial!

Of course, your content will be the most important part to atract users and get high rankings in the search engines, but it never hurts giving them some help.

If any SEO expert reading this article has some other ideas, please post them.

ABMaterial 1.05, supporting all this, will be send to the donators early next week. Quite some goodies included in this release!

Head to the B4X website, download your free copy of B4J and go to the forum to download the ABMaterial framework.

Alwaysbusy

Some good rerading on SEO:

https://moz.com/beginners-guide-to-seo

http://webdesign.about.com/od/seo/tp/seo_tips_and_tricks.htm

SEO Heading Tags

What are Meta Descriptions

Click here to Donation if you like my work

B4J: 4.0 now supports HTTP/2, perfect tool for my ABMaterial framework

ABMaterial

You all know me as a Xojo fanatic, but lately I lost a bit of interest because the focus of the last year was so much about Apple, and Windows/Linux was a bit forgotten.

So I got back to my other favorite, B4X.  And what a pleasant ride it has been so far! It truly is a far to little known gem with so much power under the hood. Creating apps for Android, iOS, Desktop and Server apps is a blast.

Being able to share code between devices, having a simple but powerful (free) IDE, a very active community and a developer that really listens was quite refreshing.

My next project was writing a Material Design framework for Web Apps, without having to write a single line of HTML, CSS or JavaScript.  And quickly, it became obvious B4J was the one tool that could do it. ABMaterial was born.

Using very little code, you’re able to write beautiful (based on Material CSS) and powerful (B4J really stands out here) WebApps.  The enthusiastic crowd at the forum has pushed me through several nights continuing to write on the framework and has made me, although some polishing is still needed, a very happy camper.

It will be very useful to write WebApps (automatically adapting to the screen size of your device), and I even see it to be great to write nice interfaces for your Raspberry Pi projects. It consists of 25+ ‘themeable’ controls and some easy-to-use helpers to design your layouts.

To prove B4J is really on edge with the latest technologies, Erels latest release 4.0 for Christmas now supports HTTP/2. Benchmarks showed a big difference in speed and will undoubtedly be very useful for mobile devices.

I’ve set up a live demo of ABMaterial on my modest media center computer here. So, be gentle with her…

Or if you want to try it out yourself, head to the B4X website, download your free copy of B4J and go to the forum to download the ABMaterial framework.  The current ‘public’ version is 1.03.  Donators get updates (1.04 as at time of writing) about 2 to 3 weeks beforehand so I’m able to better control questions/feature requests or bugs (aaarrhh!).

I wish you all some very happy Holidays and I hope I’ll see you all next year for some more fun programming projects!

Alwaysbusy

Click here to Donation if you like my work


B4i: 1 … 2 … 3 … Ready … Go!

B4i2
This weekend I’ve found some time to setup my testing environment for B4i, the latest brainchild of Anywhere Software. I must say, being a novice Mac user, setting everything up went very smooth.

The only parts I got into some trouble was my own fault, as I went though the setup tutorials, videos and Beginners Guide just a little bit to fast. Eager to get started, I skimmed through them and forgot some important steps.

First I paid my obligatory taxes to Apple: $99/year. (Programming for Android only sets you back with a one time fee of $25). Only a couple of minutes later, my account was activated.

One part that may have gone a bit to fast for a first time Apple developer was the creation of an App ID. As Erel had his system already setup when he made the video and could just pick an App ID, he did not show us how to create it in the first place. It is mentioned further in the post you can create a single wildcard App ID if you put a .* at the end, but this was not very clear from the tutorial. So, this is how I did it:

Click to enlarge
Click to enlarge

Another RTFM moment was when I wanted to install the B4i-Bridge app on the device. I started watching the video and forgot to read the bold sentence above it:

Before you install B4i-Bridge you must install the B4I certificate. This step is not shown in the video. Open Safari (device browser) and navigate to: www.b4x.com/ca.pem

Clearly stated, but hey, I was in a hurry…

I first tried the Hosted Builder option to compile the app. Very smooth and a excellent alternative for Windows developers who do not own a Mac. And for $26 a year, a bargain.

But, as I want to experiment with creating libraries myself in Objective-C, I wanted to install the local MacBuildServer. Again, following the tutorial, everything went very well. Downloading XCode took most of the time.

One note: Make sure your Mac is in the same IP range as the rest of your development environment. At first, the Mac had IP 192.168.40.116 while the rest was in the 192.168.1.x range. So it didn’t work.

The rest was pure cosmetic. I added an shortcut on the Mac to start the MacBuildServer, and one on the PC side to shut it down.

Creating the shortcut on the Mac side went like this:

  • Open up a terminal
  • go to the folder where you unzipped the macserver-aa (in my case, it’s on the desktop, so it looked like this:

    $ cd desktop
    $ cd macbuilder-aa

  • create a text file

    $ shout start.command

  • add the following lines (adjust the cd to the path where your MacBuildServer is)

    #!/bin/sh
    cd /Users/Alwaysbusy/Desktop/macserver-aa
    java -jar B4iBuildServer.jar

  • save and in the terminal type:

    $ chmod -x start.command

  • Right click on start.command, pic ‘Get Info’ in the menu and rename it to something like ‘B4i Build Server Start.command’.
    Click ‘Hide extension’
  • And change the icon to a nice B4i one. I’ve ripped the B4i icon from the exe (sorry Erel) and saved it as a .png. In case you need it, here it is:
    B4i
    Open the png on the Mac in preview and copy it (Edit – Copy). In the ‘Info Panel’ of the command file, click on the icon until it gets a blue rectangle. Then you can do ‘Edit – Past’.
    In my case, it looked like this:

B4i3

Coming from Windows and being used to creating .bat files, this is all rather complicated on a Mac I must say.

On the PC side I created also the icon to shut the MacBuildServer down. Enter http://:51041/kill in your favorite browser. Create a bookmark and drag it to your desktop. Rename it to something like ‘B4i Build Server Kill’. You can also change the icon:

  • Right click on the shortcut and pick ‘Properties’
  • Press ‘change icon’
  • Browse to where you have installed B4i
  • Pick B4i.exe and select the icon

So (besides my shortcut creation problems on a Mac), setting up B4i is a breeze! I’m ready to add some serious iOS programming experience to my portfolio.

Get B4i now for only $59 from the Anywhere Software Store!

Here are some quick links to the tutorial parts I used:
Creating a certificate and provisioning profile
Installing B4i-Bridge and debugging first app
Local Mac Builder Installation

See ya!

Alwaysbusy

B4i: Official release at special introductory price!

B4I logo
Great news from Anywhere Software! B4i (a development tool for native iOS applications) is released today.

I had good hopes we would have an early Christmas this year from Erel, but it looks like he has outdone himself (again!).

From its beta release only a couple of weeks ago, B4i looked very stable and already feature rich. Knowing how the B4A (Basic4Android) community quickly has grown very solid, with many contributors creating all kind of great libraries, I have no doubt B4i will be any different. Congratulations Erel with another state-of-the-art development tool!

But let’s give the master himself the stand now (from the official site):

Erel: B4i follows the same concepts of B4A and B4J and provides a simple yet powerful rapid application development tool for iOS applications.

Requirements

– Apple developer account (costs $99 per year).
– An iOS device running iOS 7+.

The compilation process requires a Mac computer. You can either use a local Mac computer or use our Hosted Mac Builder service (currently costs $25 per year).

Documentation

– Tutorials: http://www.basic4ppc.com/android/forum/forums/ios-tutorials.63/
You should start with the following three tutorials:
Creating a certificate and provisioning profile
Installing B4i-Bridge and debugging first app
Developers who use a local Mac: Local Mac Builder Installation

– Formal documentation: http://www.basic4ppc.com/b4i/documentation.html

Purchase

B4i can be purchased from the Anywhere Software Store for just $59!
B4i includes two years of free upgrades.

Hosted Mac Builder

The builder service allows you to develop iOS applications without a Mac computer.
All of the development steps can be done with the builder service except of the final step which is uploading the application to Apple App Store. This step requires a Mac or a service such as MacInCloud.
Note that the builder is currently limited to projects of up to 15mb.

Looking forward to play with this!

B4i: First B4i app in Apple App Store

First B4i App in the store!
Breaking News! Erel has put up the first B4i app on the Apple App Store. I have a feeling we won’t have to wait much longer until we can build iOS apps in this wonderful tool.

While Xojo keeps saying ‘it’s ready when it’s ready’ (it’s getting old Xojo…), B4i is going to take the world by storm! Tools by Anywhere Software have proven to be very stable and production ready by its first releases, so you better start thinking what your first app written in B4i will be like. I know I am…

You can download the app from the store here.

Realy looking forward for this one! I may even buy my first iPhone just to be able to play with it #ChuckleByMyFriends

Alwaysbusy

Xojo: THE Canvas reference book

Program the Canvas Control with Xojo Desktop

I Wish I Knew How To… Program the Canvas Control with Xojo Desktop is the latest book of Eugene Dakin in his excellent I Wish I Knew How To… series.

If you ever wondered how stuff is done with the canvas control in Xojo, this is the book you need to have on your virtual shelf. In his well known swift (no pun intended) style, Eugene has written the reference manual for you. Alwaysbusy’s Corner did some humble contributions to the more advanced topics.

For the novice Xojo user, you quickly can get started and learn about the basics of graphics. Step by step you learn more and more when you move through the more advanced topics. This 400 page volume covers a lot of interesting chapters and includes a lot of useful examples with source code:

Topics included in the book:

Text
Chart Fundamentals
Objects
2D Objects
Graphics
Blurring
Cropping
Gaussian Blur
Building basic controls
Animation
and there are two games with step-by-step code explanations to help you build your own.

So head over to Eugene’s Personal Website and get your copy. Also check out his other books in the series on topics like SQLite, XML, PostgreSQL, Office etc…

Click here to Donation if you like my work

B4i Update: Looks so cool!

Can’t wait to play with this. When you’re used to work with B4A, this looks/feels so natural. I bet the learning curve will be absolutely flat.

…Note that the device is not connected with a cable to any computer.
The debugger is almost fully working. You can put breakpoints, monitor the variables and run watch expressions…

Well done Erel!

B4i (iOS): Yup, you read that right!

(Not official logo)
(Not official logo)

Amazing news from Anywhere software: Erel is working on B4i! This development suite for cross development (Android/Mac/Windows/Linux) will be joined by iOS.

After the great success of Basic4Android (simply the best development tool for Android, by far), Erel suprised us all with Basic4Java last year. A free! tool to create cross platform software for Mac, Windows and Linux.

And now, he has an ever bigger suprise: Basic4iOS!
Just like it’s brother B4A, B4i will compile to native code (Objective C in this case). Combined with the powerful IDE (Xojo, check this one out, it’s bug free and blazing fast) with its unique debugging capabilities and features, this is a certain winner, again!

As a Windows developer, you won’t even need a Mac to compile:

…The current plan is to host a cloud of Macs for the compilation which means that developers will not need to have access to a Mac computer. There will also be an option to host the remote Mac compiler locally instead of the cloud compilers…

And the clever debugging tricks well known from B4A will also be at your fingertips:

…The rapid debugger will allow modifying the code without rebuilding the package making the “testing cycle” much quicker…

It’s simply amazing how Anywhere Software can build such powerful (and most of all stable and reliable) development tools in such a short time span. And at a price that dwarfs the competition!

Well done Erel! We are looking forward for this little beauty by the end of this year. It’s gonna be great, I’m sure of that!

Alwaysbusy

Let’s write a Flappy Bird clone!!!

Looking forward to this series of articles Andy! I hope you do the B4A part first 🙂

Andy McAdam's avatarCoffee Induced Games

Flappy Bird has been massively popular. But one key thing about it, and one reason why its so popular is its simplicity. Based on that fact, I’m going to run a short series of videos and blog entries showing my efforts to write a Flappy Bird clone, both for PC and Android.

I will be using Blitz Plus for the PC version. I’ve mentioned this language before as it’s a brilliant tool for writing which simple idea for games to see how they’ll work in practice. You can then either wrote your whole game using Blitz Plus or in another language if you’re requiring fancy graphics effects or writing for a different platform like Android. Blitz Plus can be downloaded for free at http://www.blitzbasic.com go to the products page and follow the instructions there.

For the Android version we’ll be using Basic4Android . As it’s an easy language to use…

View original post 67 more words

QuiQRun! launched

Barcelona Skin
Barcelona Skin

QuiQRun!, the social, fast barcode scanner and creator!

I’m very happy to release the first version of QuiQRun! for Android! In the next weeks I may do a couple of articles on the blog on how some things are done. (Basic4Android and Java).

I want to thank everyone that did test and translate the app!

Download free version

Please rate QuiQRun! if you like it!

More information and screenshots can be found at http://www.quiqrun.com

Alain

QuiQRun! Localization

QuiQRun! Skin Italia
Skinning QuiQRun!

Hi all,

I’m looking for people who can translate about 150 terms and some short sentences for my new app QuiQRun! If you can help me, send me a mail to alain.bailleul@pandora.be.

I already have English, Dutch, Italian, French, German, Spanish and Portuguese.

What can I offer?

1. The full version of QuiQRun!
2. A skin in QuiQRun! with your favorite colors
3. Full credit in the apps credits screen
4. Eternal gratitude!

How do I use it in B4A?
The translations are stored in a language file, eg. en-us.lng.

They are stored in a predefined format:

{0000};Scanned
{0001};Scan
{0002};Create
{0003};Setting new skin, one moment...
{0004};Tap to get more info!
{0005};This QRCode is expired!
...

In Basic4Android, It checks if it has a translation, if not it uses the default you put in the GetString function. Here is the snippet I use:

Sub Process_Globals
    Public LangStrings As Map
    Public BOM As Int = 65279 ' Byte Order Mark for Windows UTF-8 files
End Sub

Sub Activity_Create(FirstTime As Boolean)
    Dim R As Reflector
    R.Target = R.RunStaticMethod("java.util.Locale", "getDefault", Null, Null)
    Dim tmpLang As String = R.RunMethod("getLanguage")
    Select Case tmpLang
        Case "nl"
            LoadLanguageFile("nl-be.LNG")
        Case "fr"
            LoadLanguageFile("fr-fr.LNG")           
        Case "it"
            LoadLanguageFile("it-it.LNG")
        Case "es"
            LoadLanguageFile("es-es.LNG")
        Case "de"
            LoadLanguageFile("de-de.LNG")
        Case Else
            LoadLanguageFile("en-us.LNG")
    End Select

    ' using it:
    ToastMessageShow(GetString("{0003}","Setting new skin, one moment..."), true)
End Sub

Public Sub LoadLanguageFile(setLanguageFile as String)
    LangStrings.Initialize
    
    If File.Exists(File.DirAssets, setLanguageFile) Then
        Dim txtR As TextReader
        txtR.Initialize(File.OpenInput(File.DirAssets, setLanguageFile))
        Dim line As String
        line = txtR.ReadLine
        Do While line  Null
            line = line.Replace(Chr(BOM), "")
            LangStrings.Put(line.SubString2(0,6), line.SubString(7))
            line = txtR.ReadLine
        Loop
        txtR.Close
    End If   
    
End Sub

Public Sub GetString(iCode As String, iDefault As String) As String
    If LangStrings.ContainsKey(iCode) Then
        Return LangStrings.Get(iCode)
    Else
        Return iDefault
    End If
End Sub

Thanks!

Alwaysbusy

QuiQRun! A glimpse…

QuiQRun
I’m currently working on my new Android app called QuiQRun and this is the first time it is presented to the public. It is currently in the testing phase so it won’t be long until I will release it to Google Play.

What is QuiQRun?

QuiQRun consists of two main parts:

1. The White side: Save – Share – Scan QR Codes

• Scan QR Codes and barcodes with our fast build in scanner
• Decrypt codes created with QuiQRun Security and read codes generated by other apps
• A human readable summary and the raw QR data
• Save codes for later use. All codes are organized in a nice list for easy retrieval.
• Share your QR Code on Facebook, Twitter, Email, Dropbox and many more…
• Use the QR Code immediately on your smartphone

2. The Black side: Make – Share – Protect QR Codes

• Make QR Codes for Websites, Wifi, Contacts, locations, coupons and many more…
• Protect your QR Code with QuiQRun Security
– Encryption
– Prevent saving the QR Code
– Password or PIN protect
– Set an expiration date
• Share your QR code on Facebook, Twitter, Email, Dropbox and many more…
• Use the QR Code immediately on your smartphone

And here are the first screenshots!

QuiQRun
QuiQrun on Android

QuiQRun is written in Basic4Android. If you are a licensed user of B4A you can download an exclusieve preview version from the B4A ‘Test my App!’ forum! I would definitely appreciate the feedback 🙂

More information and screenshots can be found at QuiQRun

The coming weeks I’ll keep you up to date. Follow me on Twitter: QuiQRun

Alwaysbusy

Basic4Android v3.20 is released!

B4A Anchors
B4A Anchors

Again, another great update of B4A! Erel has continued to improve the visual designer, this time with a great new feature you may know from typical PC languages: Anchors. (Xojo/Realbasic users may recognize them as the LockLeft, LockTop, LockRight and LockBottom properties)

Anchors allow you to define a constant distance between the view and one or more of the parent bounds. By using anchors, you can design screens and B4A will ‘stretch’ them according to the device size. This is different than scalling because it takes more relative positions into account.

Here is a short video demonstrating the anchore feature:

Important designer improvements:
* Copy & paste – work both inside the layout or between different layouts.
* Undo / redo feature.
* The views are organized in a tree for easier navigation.
* AutoScaleAll keyword now works with all variants, not just the “standard” variant.
* Colors fields can be copied and the colors values can be pasted or directly typed.
* Designer script find / replace dialog.
* The grid is saved in the layout file.
* Landscape / Portrait designer keywords to test the current orientation.
* UI Cloud threshold reduced to 10 seconds.

Other great new features and improvements:
* #AdditionalRes attribute
* Sync button in the Files tab – Syncs the project files with the Files folder.
* Modules added to the Find Sub / Module tool (Ctrl + E).
* Tabs order in the IDE is preserved.
* Modules files that were not modified will not be saved thus preserving the correct time stamp.
* DateTime.SetTimeZone now accepts a Double instead of Int.
* Shortcuts: F11 – Restart (rapid debugger), F2 in the designer connects to the device.
* JavaObject v1.00 – new RunMethodJO / GetFieldJO methods.
* Bug fixes and other minor improvements.

So head to the B4A website to check it out and if you don’t have a license yet (hard to believe because it is worth every penny), now is a great time to get one!

Alwaysbusy!

Basic4Android: A first look at ABPlay, a game engine library

ABPlay Screenshot
ABPlay Screenshot

It has been a while since I’ve written a new article on this blog because it have been busy months both at work and in my personal life. One of the things I wanted to do was writing an easy to use Game Engine for B4A. I have written the ABPhysics engine in the past and recently Informatix pointed out I had started another engine (ABGameEngine) before that. Development on ABGameEngine was stopped early for several reasons: time was one of them, but also because several other developers were working on an engine themselves. It seemed a little bit pointless to continue.

However, the other engines were not further developed either. Until recently Erel came up with the GameView. This is an excellent View that will cover the needs of a lot of beginning programmers. I definitely would like to urge starting game developers to take a look at this. Registered users of B4A can download the GameView lib from here.

But still, I wanted something more. I looked at ABgameEngine again, as it had some great ideas like layers, animated sprites, gamepads etc. But it was also very old code and not written very well. And it crashed all the time 🙂

I decided to restart from scratch a couple of weeks ago. Some weekends and evenings later ABPlay was born! And with a lot of goodies!

Here is a small demo video of what I got so far. it demonstrates the following:

1. Layers
     (Layer 1) the moving background with the Odies as animated sprites
     (Layer 2) the black foreground layer with a weird dancing creature that passes now and then
2. Animated sprites, not bound to a layer
     (our hero Garfield is back!)
3. A sprite can have different animations.
     (like one for standing, one for walking, one for fighting, etc)
4. A sprite can have different predefined 'Walks'
     (A walk can be build like you would build a path. It's a sequence of lines, bezier curves, wait periods etc. It's like a simple flash movie)
5. Gamepad controls
     (the 'joystick' pad on the left)
     (the 'action' pad on the right)
     (the 'direction' pad as an alternative to the joystick, not shown in this video)
6. In the demo I cannot demonstrate it with a mouse, but it is completely multi touch
     (You can control Garfield AND press the Action button X AND do a swipe anywhere at the same time)

But let’s have a look (beware this is running on the Emulator. On a real device it is much smoother):

I’m actually very pleased with the result. The graphics and handling is very smooth.
Above all, it’s still very easy to program. Here is the whole code for the demo app:

#Region  Project Attributes
	#ApplicationLabel: ABPlayTest
	#VersionCode: 1
	#VersionName:
	'SupportedOrientations possible values: unspecified, landscape or portrait.
	#SupportedOrientations: landscape
	#CanInstallToExternalStorage: False
#End Region

#Region  Activity Attributes
	#FullScreen: true
	#IncludeTitle: false
#End Region

Sub Process_Globals

End Sub

Sub Globals
	Dim myPlay As ABPlay
	' the panel that will hold the ABPlay
	Dim myPanel As Panel

	' a background and foregroud layer
	Dim bgLayer As ABLayer
	Dim fgLayer As ABLayer

	' some colors to show the multi touch points in the demo
	Dim myColors() As Int = Array As Int(Colors.Red, Colors.Green, Colors.Blue, Colors.Cyan, Colors.Yellow, Colors.Gray, Colors.White, Colors.Magenta, Colors.LightGray, Colors.DarkGray)

	' our hero
	Dim Hero As ABSprite
	' our enemies
	Dim Enemies As List

	' param to set the set the speed
	Dim Speed As Float = 0.2

	' some variables to hold the current state of the hero
	Dim currentAction As String
	Dim currentDirection As String
	Dim currentIsStanding As Boolean
End Sub

Sub Activity_Create(FirstTime As Boolean)
	' initialize ABPlay with myPanel
	myPanel.Initialize("")
	Activity.AddView(myPanel, 0,0,100%x,100%y)
	myPlay.Initialize(myPanel, "myPlay")

	'////////////// BEGIN loading sprite sequences
	' Load Sprite Sequences
	myPlay.LoadSpriteSequence("GarStandingLeft",LoadBitmap(File.DirAssets, "garleftstill.png"),6, 1, 1000)
	myPlay.LoadSpriteSequence("GarStandingLeft",LoadBitmap(File.DirAssets, "garleftstill.png"),6, 1, 1000)
	myPlay.LoadSpriteSequence("GarStandingRight",LoadBitmap(File.DirAssets, "garrightstill.png"),6, 1, 1000)
	myPlay.LoadSpriteSequence("GarWalkingLeft",LoadBitmap(File.DirAssets, "garleft.png"),8, 1, 1000)
	myPlay.LoadSpriteSequence("GarWalkingRight",LoadBitmap(File.DirAssets, "garright.png"),8, 1, 1000)
	myPlay.LoadSpriteSequence("GarStandingLeftFight",LoadBitmap(File.DirAssets, "garleftstillfight.png"),2, 1, 250)
	myPlay.LoadSpriteSequence("GarStandingRightFight",LoadBitmap(File.DirAssets, "garrightstillfight.png"),2, 1, 250)
	myPlay.LoadSpriteSequence("GarWalkingLeftFight",LoadBitmap(File.DirAssets, "garleftfight.png"),7, 1, 1000)
	myPlay.LoadSpriteSequence("GarWalkingRightFight",LoadBitmap(File.DirAssets, "garrightfight.png"),7, 1, 1000)
	' and the ones for Odie
	myPlay.LoadSpriteSequence("OdieStandingLeft", LoadBitmap(File.DirAssets, "odieleftstill.png"),7,1,Rnd(800,1200))
	myPlay.LoadSpriteSequence("OdieStandingRight", LoadBitmap(File.DirAssets, "odierightstill.png"),7,1,Rnd(800,1200))
	myPlay.LoadSpriteSequence("OdieWalkingLeft", LoadBitmap(File.DirAssets, "odieleft.png"),5,1,Rnd(800,1200))
	myPlay.LoadSpriteSequence("OdieWalkingRight", LoadBitmap(File.DirAssets, "odieright.png"),5,1,Rnd(800,1200))
	' and the one for the creature
	myPlay.LoadSpriteSequence("CreaturePassToRight", LoadBitmap(File.DirAssets, "creature.png"), 3, 4, 1200)
	'////////////// END loading sprite sequences

	'////////////// BEGIN building the Hero Garfield
	' initialize the hero
	Hero.Initialize("Hero", 50%x, 50%y)
	' add sprite sequences
	Hero.AddSpriteSequence("GarStandingLeft")
	Hero.AddSpriteSequence("GarStandingRight")
	Hero.AddSpriteSequence("GarWalkingLeft")
	Hero.AddSpriteSequence("GarWalkingRight")
	Hero.AddSpriteSequence("GarStandingLeftFight")
	Hero.AddSpriteSequence("GarStandingRightFight")
	Hero.AddSpriteSequence("GarWalkingLeftFight")
	Hero.AddSpriteSequence("GarWalkingRightFight")
	Hero.StartSpriteSequence("GarStandingLeft", True)
	currentDirection="LEFT"
	'//////////////  END building the Hero Garfield

	'////////////// BEGIN building the background layer with Odies
	' initalize a background layer
	bgLayer.Initialize("background", 0,0)
	bgLayer.SetBackground(LoadBitmap(File.DirAssets, "bga.jpg"), 1.0)
	myPlay.AddLayer(bgLayer)

	' initialize some enemies
	Enemies.Initialize
	Dim a As Int
	For a = 1 To 10
		Dim Odie As ABSprite

		' initialize an Odie with some animation sequences
		Odie.Initialize("Odie" & a, Rnd(10%x,90%x), Rnd(10%y, 90%y))
		' add multiple sprite sequences
		Odie.AddSpriteSequences(Array As String("OdieStandingLeft","OdieStandingRight","OdieWalkingLeft","OdieWalkingRight"))

		' create a random walk to the right
		Dim WalkRight As ABSpriteWalk
		WalkRight.Initialize("ToTheRight", True)
		Dim newX As Int = Odie.x+Rnd(20%x, 80%x)
		WalkRight.AddLine("OdieWalkingRight",Odie.x, Odie.y, newX, Odie.y, Rnd(90,100))
		WalkRight.AddWait("OdieStandingRight",newX, Odie.y, Rnd(10,50))
		WalkRight.AddLine("OdieWalkingLeft",newX, Odie.y, Odie.x, Odie.y, Rnd(90,100))
		WalkRight.AddWait("OdieStandingLeft",Odie.x, Odie.y, Rnd(10,50))
		Odie.AddWalk(WalkRight)

		' create a random walk to the left
		Dim WalkLeft As ABSpriteWalk
		WalkLeft.Initialize("ToTheLeft", True)
		Dim newX As Int = Odie.x-Rnd(20%x, 80%x)
		WalkLeft.AddLine("OdieWalkingLeft",Odie.x, Odie.y, newX, Odie.y , Rnd(90,100))
		WalkLeft.AddWait("OdieStandingLeft",newX, Odie.y, Rnd(10,50))
		WalkLeft.AddLine("OdieWalkingRight",newX, Odie.y, Odie.x, Odie.y, Rnd(90,100))
		WalkLeft.AddWait("OdieStandingRight",Odie.x, Odie.y, Rnd(10,50))
		Odie.AddWalk(WalkLeft)

		' pick random a walk, left or right
		Dim GoLeft As Int = Rnd(0,2)
		If GoLeft = 0 Then
			Odie.StartWalk("ToTheRight")
		Else
			Odie.StartWalk("ToTheLeft")
		End If
		bgLayer.AddSprite(Odie)
	Next
	'////////////// END building the background layer with Odies

	'////////////// BEGIN building the foreground layer with creature
	' initalize a foreground layer
	Dim fgLayer As ABLayer
	fgLayer.Initialize("foreground", 0,0)
	fgLayer.SetBackground(LoadBitmap(File.DirAssets, "fga.png"), 100%y/400)
	myPlay.AddLayer(fgLayer)

	' and a weird creature...
	Dim creature As ABSprite
	creature.Initialize("creature", -100%x, 100%y-240)
	creature.AddSpriteSequence("CreaturePassToRight")
	' with a walk
	Dim pass As ABSpriteWalk
	pass.Initialize("DanseToTheRight", True)
	pass.AddLine("DansingRight",creature.x, creature.y, 200%x, creature.y, 300)
	creature.AddWalk(pass)
	' and start the walk
	creature.StartWalk("DanseToTheRight")
	' add the creature to the foreground layer
	fgLayer.AddSprite(creature)
	'////////////// END building the foreground layer with creature

	'////////////// BEGIN Add game pads
	' initialize and start a Joystick Gamepad
	myPlay.InitializeJoystickPad(18, 100%y-210, 192, 192 , LoadBitmap(File.DirAssets, "joystick_bg.png"),LoadBitmap(File.DirAssets, "joystick.png"))
	myPlay.ShowJoystickPad(True)	

	' initialize and start a Action Gamepad
	myPlay.InitializeActionPad(100%x-210, 100%y-210, 192, 192 , LoadBitmap(File.DirAssets, "action_active.png"),LoadBitmap(File.DirAssets, "action_inactive.png"),LoadBitmap(File.DirAssets, "action_mask.png"),True, False, True, False)
	myPlay.ShowActionPad(True)
	'////////////// END Add game pads
End Sub

Sub Activity_Resume

End Sub

Sub Activity_Pause (UserClosed As Boolean)
	' NEEDED FOR THE MOMENT TO CATCH THE HOME KEY, RESUME/PAUSE NOT YET SUPPORTED!
	myPlay.StopAndRecycle
	Activity.Finish
End Sub

Sub Activity_KeyPress (KeyCode As Int) As Boolean 'Return True to consume the event
	Select Case KeyCode
		Case KeyCodes.KEYCODE_BACK
			' NEEDED: stop the drawing thread and recycle stuff
			myPlay.StopAndRecycle
			Activity.Finish
			Return True
		Case KeyCodes.KEYCODE_HOME
			Return True
	End Select
End Sub

Sub myPlay_Draw(c As Canvas, State As ABState)
	' the actual drawing, do NOT set a debug stop in here!

	'////////////// BEGIN Calculation stuff
	' calculate hero stuff depending on what buttons we pressed on the gamepad
	currentAction = ""
	If State.UsingActionPad Then
		' go into fight state
		If State.ACTION_X Then
			currentAction = "X"
		End If
		' go back to center
		If State.ACTION_Y Then
			Hero.SetPostition(50%x,50%y)
		End If
	End If

	Dim XMovement As Int
	Dim YMovement As Int
	If State.UsingJoystickPad Then
		XMovement = State.JOYSTICK_X*Speed
		YMovement = State.JOYSTICK_Y*Speed
		' update the hero's position and direction
		If XMovement<0 Then
			currentDirection = "LEFT"
		Else
			currentDirection = "RIGHT"
		End If
		Hero.SetPostition(Hero.x+XMovement, Hero.y+YMovement)
		currentIsStanding = False
	Else
		currentIsStanding = True
	End If

	' set the animation type
	Select Case currentDirection
		Case "LEFT"
			Select Case currentAction
				Case "X"
					If currentIsStanding Then
						Hero.StartSpriteSequence("GarStandingLeftFight", False)
					Else
						Hero.StartSpriteSequence("GarWalkingLeftFight", False)
					End If
				Case Else
					If currentIsStanding Then
						Hero.StartSpriteSequence("GarStandingLeft", False)
					Else
						Hero.StartSpriteSequence("GarWalkingLeft", False)
					End If
			End Select
		Case "RIGHT"
			Select Case currentAction
				Case "X"
					If currentIsStanding Then
						Hero.StartSpriteSequence("GarStandingRightFight", False)
					Else
						Hero.StartSpriteSequence("GarWalkingRightFight", False)
					End If
				Case Else
					If currentIsStanding Then
						Hero.StartSpriteSequence("GarStandingRight", False)
					Else
						Hero.StartSpriteSequence("GarWalkingRight", False)
					End If
			End Select
	End Select	

	' update the hero animation
	Hero.Update

	' move our backgrounds, does not make sense but shows the possibilities
	Dim newX, newY As Int
	Dim newMovementX, newMovementY As Int
	newMovementX=Min(Abs(XMovement),1)
	newMovementY=Min(Abs(YMovement),1)
	If currentIsStanding = False Then
		If currentDirection = "LEFT" Then
			newX = bgLayer.ViewX
			newY = bgLayer.ViewY
			If newX-newMovementX >= 0 Then
				newX = newX-newMovementX
			End If
			If newY-newMovementY >= 0 Then
				newY = newY-newMovementY
			End If
			bgLayer.SetLayerPostion(newX, newY)
		Else
			newX = bgLayer.ViewX
			newY = bgLayer.ViewY
			If newX+newMovementX <= bgLayer.OuterWidth - myPlay.Width Then
				newX = newX+newMovementX
			End If
			If newY+newMovementY <= bgLayer.OuterHeight - myPlay.Height Then
				newY = newY+newMovementY
			End If
			bgLayer.SetLayerPostion(newX, newY)
		End If
	End If

	'////////////// END Calculation stuff

	'////////////// BEGIN Drawing stuff
	'ok, all the calulations are done, let's draw!

	' draw the background layer with all its sprites on it and advance all sprite animations and walks
	myPlay.DrawLayer("background", c)

	Dim a As Int
	' draw the multitouch points that are not on the gamepad, no action here but just to show the possibilities
	For a = 0 To State.touchPoints.Size - 1
		Dim tmpP As ABTouchPoint
		tmpP = State.touchPoints.GetValueAt(a)
		c.DrawCircle(tmpP.X, tmpP.Y, 50dip, myColors(tmpP.id), True, 1dip)
	Next

	' draw the hero
	Hero.Draw(c)

	' draw the foreground layer with all its sprites on it and advance all sprite animations and walks
	myPlay.DrawLayer("foreground", c)
	'////////////// END Drawing stuff

	' NEEDED: very last line of the Draw event. Let ABPlay know it may process touches again!
	myPlay.DrawDone()
End Sub

I’m not there yet, but it’s a good start. It needs a lot more testing and a lot of new features.

Until next time!
Alwaysbusy

Click here to Donation if you like my work